


Articles
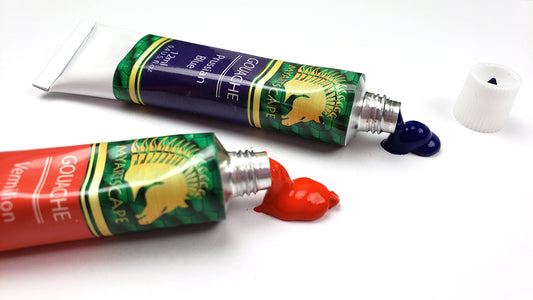
Painting with Gouache
It’s time to learn about gouache, and start painting with it too. So grab your gouache painting supplies and let’s paint!
What is Gouache
Gouache is an opaque paint, which means it is not transparent like watercolor. It is a thick, water based paint bound with a gum arabic binder, and mixed with a white pigment. It also has a velvety matte texture when dried. It can also be reactivated, like watercolor, when dried.
Gouache has the consistency of watercolor, and the opacity of acrylic. It’s like a hybrid of the two. It can also be used on a variety of surfaces, like wood, glass, ceramic, etc., because of its opaque nature. Unlike watercolor, you do not want to add water to lighten the colors. Instead, you’ll want to add white paint to achieve lighter colors.
How to Use Gouache
The nice thing about gouache paint, is that aside from mixing colors, there is no prep time. It comes pre-wet out of the tube, so all you have to do is add water and paint.When using gouache, you don’t want to work straight out of the tube. You’ll want to dilute it with water, to achieve a cream-like consistency for best results. The reason you don’t want to add too little or too much water, is because the paint will either crack or be too thin, respectively.
After you have mixed all the colors that you want to paint with, the next step is to paint. When painting with gouache, you’ll want to follow a few simple rules. Your base layers should be the thinnest, diluted with the most water. As you work on each new layer, keep adding less and less water. The less water you have in the paint, the less likely you are to reactivate the previous layers. The second rule is to work from your darkest shades, into the lighter shades. This is how to get the smoothest blending, without reactivating your layers. Since gouache dries so quickly, you’ll want to work fast, and working dark to light helps with that. However, this last rule isn’t necessary, unless you want smooth blending. If that’s not what you’re looking for, feel free to experiment!
One thing to note, is that gouache doesn’t work too well with the “wet into wet” technique. The paints tend to resist each other, instead of mixing. So, all the blending you will want to do, should be controlled with a paintbrush, like with acrylics. Keep in mind, lighter gouache colors tend to dry darker, and darker colors tend to dry lighter.
Gouache Techniques
You can perform a few different techniques with gouache paint. First, there is the “light to dark” technique. This is where you paint light colored layers, and then add your shading on top.
Next is the “dark to light” technique, which is where you start painting your dark shadows, and work in your lighter colors.
Then, there is “dry brushing.” Just like with watercolor, this is where you add little to no water to your paint to get a textured look.
Gouache is also great for linework because of its viscosity and opaqueness.
The last technique is to use water to soften the edges of the paint. Now, doing this over another lay could reactivate the previous layer, and pull it up, so be very cautious with this one.
So, now that you’ve learned the basics of painting with gouache, grab your paints and experiment to see which painting style suits you!
Article by McCaela Gates
Made especially for MyArtscape
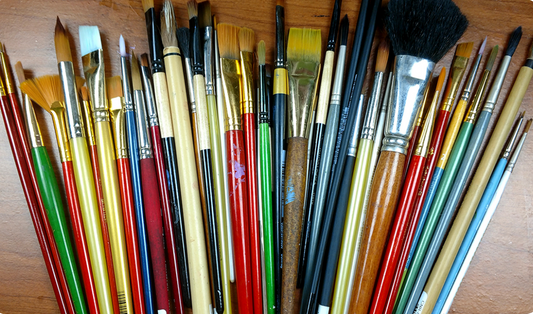
Types of Paintbrushes
Aside from the paint itself, one of the most important tools for a painter, is the paintbrush!These are an extension of you, as you paint your masterpieces. Paintbrushes come in many different bristle hair types, and shapes, and each brush is tailored for different painting styles and paints. Hopefully, this will help you choose which type of brush is best for you.
Handles
You may have heard of long handled brushes, and short handled brushes, but which one do you use? You’ll want to choose a paintbrush handle that suits how you paint.Long handled brushes are great if you paint far away from your canvas, like at an easel. Normally, longer handled brushes are larger in size than their short handled counterparts. Since the handles are so long, they’re ideal for painting in oils, when you don’t want to be too close to the fumes of the paint and mediums. They’re also great for painting in acrylics. You also don’t want to paint with a long handled brush at a desk, or you risk poking your eye! Since you’re painting further away from your piece, you may not care about fine detail, and are concerned about blocking in shapes.Short handled brushes are typically used when you are painting at a desk. Usually, when you paint at a desk, you’re relatively close to your painting, and you may not want the extra length or weight of a longer handle. These types of brushes are usually smaller in size, for more fine detail.
Hair Types
One of the most important factors in choosing which brush is right for you, is hair type. This is split into two categories: Natural hair and synthetic hair. As you might have already figured out, natural hair is made from animals. Animal hair is particularly good at holding paint and water, however, it can be quite pricey depending on the type of hair you want.
On the other hand, we have synthetic brushes. These brushes are made from nylon and polyester, and are quite the rival to natural hair brushes. For each type of natural hair brush, there is a synthetic counterpart that performs as well as, if not better than, the natural hair. They’re also a lot more affordable.
For watercoloring, you’ll want a nice, soft brush with the capability of holding large amounts of water. For this, you’ll either want a kolinsky, or a sable brush, if you’re looking into natural hair. These hair types are ideal for holding water, they provide a nice snap, and hold paint very well. If you’re thinking of going the synthetic route, a nice golden taklon brush will do wonderfully. They provide the same benefits of a kolinsky or a sable brush.As far as oils and acrylics are concerned, you’re going to want to go with a hog bristled brush, for natural, or an imitation bristled brush, for synthetic. Again both types perform just as well as the other. These stiff bristled brushes don’t hold much water, but are resilient, and create nice brush strokes. If you don’t want brush strokes in your oil or acrylics, a golden taklon brush would be perfect.One very important thing you want to keep in mind is, you should never mix your water based brushes, with your oil based ones. This can damage a brush very quickly. Keep a set for each type, and if possible, each medium you paint in.
Brush Shapes
After you’ve figured out what hair type you want, the next thing would be to decide which brush shape to paint with. Most paint set come with a variety of shapes, and each shape has it’s uses. Each brush can be used with any medium, but some brushes are better suited toward a particular paint. One of the most common brushes, is a round brush. Rounds are brushes that sport a nice round body, and come to a nice point. These are ideal for watercoloring, and getting into small areas. These brushes usually have a nice spring to them, and you are able to get a nice variety of line thicknesses with them.
Similar to the round, is a liner, or a rigger brush. These are visually similar to rounds, but they are skinnier and have longer hairs. Liners can hold a lot of paint, which makes them ideal for lettering. You can even use the for tiny details, like animal fur. This is a brush that can be used across all media very well.
Another somewhat common brush, is the flat brush. These paintbrushes are, as the name suggests, a flat edged brush. Flat brushes are great for blocking in large areas, and getting crisp edges. Usually the bristles in a flat brush are twice as long as they are wide. These are mainly used with watercolor, but can be used with oil and acrylic.
Then there is the bright brush, which is very similar to a flat brush. Brights are equally as long as they are wide, and tend to curl inward a little. While using a bright, you have a little bit more control over your paint, than with a flat. These brushes are usually used for oils and acrylics.
As the name suggests, angle brushes have an angular cut in the hairs of the brush. Angle brushes are fantastic for getting precise lines, and are great for line variations. You can also get nice edges and get into corners easily with angle brushes.
Lastly in the flat family, we have the wash brush. Wash brushes are used for very broad strokes, and because they have very short bristles in relation to their width, you have even more control over them. They’re mostly used in watercolor painting.
Filbert brushes are almost a hybrid between a round brush and a flat brush, making them very versatile. You can either hold it flatly to the canvas or paper to make nice broad strokes and block in areas, or turn it to the side, to create thinner lines. Since these are great for blending because of the rounded top, they are really good for acrylics and oils.
Fan brushes are brushes with the hairs arranged in a fan shape. These paint brushes are great for getting texture, and for painting things like trees, grass or fur. Fan brushes can also be used for soft shading, and blending.
The last brush to talk about, is the rake brush. Rake brushes are considered special effects brushes, because of the interesting marks they make. They look like a regular flat brush, with the exception of the tips, which are very sparse, resembling a rake. Rake brushes are commonly used for painting grass, cross hatching, fur, wood grain, and more!
Now, which brush do you pick? Well, that’s all up to you. A lot of brushes come in a set that has a variety of brush shapes. Each brush shape has its own unique skills, so try them out, and see which brushes you like the most. Just because a brush is good for one thing, doesn’t mean you can’t use it for another, so feel free to experiment!
Article by McCaela Gates
Made especially for MyArtscape
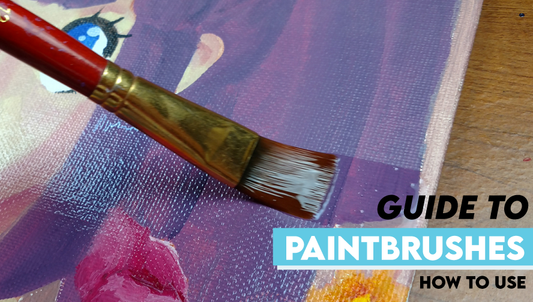
Guide to Paintbrushes - How to Use
With so many different shapes and sizes of paintbrushes, there are also many different uses for them.
For the most part, you can make any brush work for any of your painting needs. However, knowing what each brush can do makes painting easier!
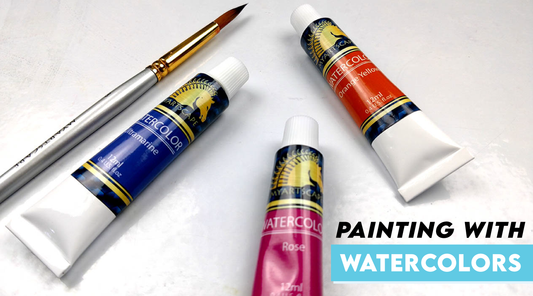
Painting with Watercolors
Let’s talk about what watercolor is made of, how to use them properly, and how to do some cool watercolor techniques.
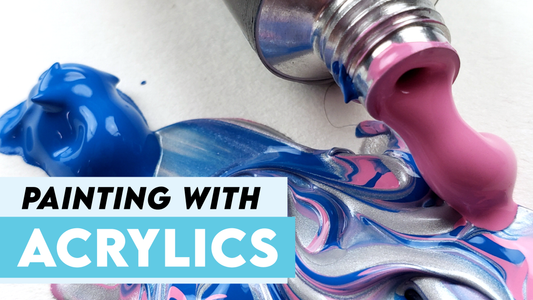
Painting with Acrylics
Now that you have the supplies, let’s start painting with acrylics. Let’s learn a little bit more about them, and talk about tips and painting techniques you could try.
What are Acrylics?
Acrylic paint is usually made up of two components: the pigment and the binder.However, you can’t just slap pigment and binder together to create the acrylic paint, so it’s a bit of a balancing act. A few things are added to the mixture to create a usable paint. These include: emulsifiers to prevent the polymer solids from binding together, dispersants to keep the pigments from clumping, wet-edge agents to regulate the drying time, and thickeners to create the buttery texture of the acrylic paints.
How to use Acrylic Paints
For the most part, you won’t need too many things to get started with acrylic painting. A lot of the prep time with acrylics, will be spent pre-mixing your paints. Aside from the paint itself, you’ll need some paintbrushes, a jar or two of water, a palette to mix your paints on, a rag or paper towel for wiping your paintbrushes onto, and canvas, wooden board or canvas panel to paint on.Time to prep those paints! Grab the colors you want to paint with, or the paints you want to mix together, and squeeze them out onto a palette. You can either mix them together using a palette knife, or your paintbrush. Make sure to mix a little more paint color than you think you’ll need. It’ll prevent you from having to mix more later, and risk not mixing the exact same color. Work quickly though! Acrylic paints dry relatively fast.
Now that you have your paints all mixed and ready to go, it’s finally time to paint.
When you work in acrylics, you’ll want to work in layers. The first layers should be thinned down with either water or a thinning medium, to help plan out your painting.You can use your thinned down paint as a tool for sketching your piece, and as you add layers it won’t show through. This is called an underpainting, and it’s a great starting off point.
Because of the opaque nature of acrylics, it’s very easy to correct any mistakes you might make. All you have to do is let the problematic layer dry, and go back over it afterwards.
As you layer your paints, you’ll want to work more and more opaquely, using more paint and less water or medium than your previous layers. You should let each layer full dry before starting a new layer, unless you are wanting to work wet into wet.
Something beginners might find frustrating about acrylic paints is blending. Since acrylic paint dries quickly, it can be hard to make seamless blends.
There are mediums which you can add to your paints to help, which will be covered a bit later, or you can always use water to prolong the drying time. You’ll only need a tiny bit of water, which you can put into a spray bottle and gently mist to keep your paint damp. Don’t use too much, or you risk making your paint run and bleed onto the canvas. Another thing that can help with blending, is a dry, fluffy paintbrush, and a light touch.
Different Acrylic Painting Techniques
There are many different techniques you can play with, when using acrylics, and these are a few of them. Try them out for yourself! First off, there is dry-brushing. This is a very simple technique, and only requires a bit of paint, and a dry paintbrush.
Wet on Wet
A great method for blending is the wet into wet technique. This method is where you keep adding paint to already wet layers, and blend them into each other. This technique can be handy, but it is easy to build up too much paint. Be careful not to over blend, as your painting can get muddy.
Washing
The next technique to try is called, washing. Basically, you’ll want to water your paint down, to a watercolor consistency. This is great for soft effects like watercolor, that dry to be permanent.
Stippling
Another great technique is stippling. Stippling is very easy to do, and requires lots of dotting of your paintbrush onto the canvas, to create texture.
Sponging
Similar to stippling, is a technique called sponging. This can be achieved by dabbing a sponge onto your painting surface, to create different and interesting shapes and textures.
Impasto
Next technique we’re going to talk about is called impasto. It’s a very fun technique, where you add thick amounts of paint in strokes with a palette knife. It’s a great way to add texture to any painting.
Glazing
Glazing is also a fantastic technique to try. By mixing a glazing medium with acrylic paint, you create a transparent film to glaze over other colors, tinting them and creating a stained-glass effect.
Detailing
The last technique is something you might be familiar with, and that is detailing. Detailing is when you use a fine paintbrush to add finishing touches to a painting.
Now, grab your acrylic paints, and try some of these tips and techniques for yourself!
Article by McCaela Gates
Made especially for MyArtscape
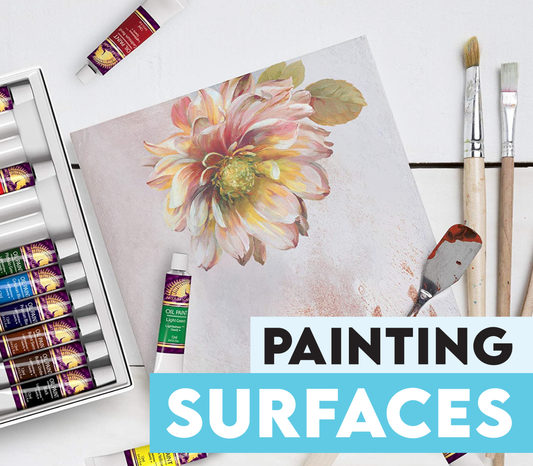
Painting Surfaces
With any painting, you’re going to want a good surface to paint on. For each type of paint, there are a few options to choose from, depending on your preference.From watercolor papers, to stretched canvases, there is always an option for everyone.
Watercolor Paper
When you plan painting with media that may need a lot of water, like watercolor and gouache, you’ll want something that can handle the water. Watercolor paper is specifically designed to work well with both watercolor and gouache. When picking out a watercolor paper, you don’t want paper that’s too thin. Usually, any watercolor paper labeled 140lb (300 gsm) is a great start. You could even get a heavier paper if you wish. You want to make sure that the paper is meant for water-based media, because even if the paper is heavy enough, if it isn’t designed for water, it won’t be coated. Non-coated papers will warp badly and peel with water.Along with paper weight, another thing to consider is the paper texture. Most watercolor papers come in hot press and cold press, some occasionally come in rough. Hot pressed watercolor paper has a very smooth texture, whereas cold pressed has a rough, toothy texture. Rough paper is just like cold pressed, but with more texture to it. However, texture is really the only difference, so feel free to experiment with which one you like most.Another thing to consider is what the paper is made of. Most watercolor papers are made with a mixture of wood pulp and other cellulose fibers. Higher quality papers are made with 100% cotton, and are more expensive. These higher quality papers can also take a lot more lifting, scrubbing, etc., than the lower quality papers.
Canvas and Panels
If you’re painting with thicker paints, like acrylic and oils, you will want a sturdy surface that can handle them. For that, you will want a canvas of some type. There are a few types of canvases: One is stretched canvases, which are canvases stretched over wooden bars, you can buy these pre-stretched, or you can stretch your own.Another is canvas panels, which are canvases mounted to a solid board. Lastly, there are also canvas pads, which are pads of paper, meant to mimic canvas texture. Canvas pads are great for beginners, or for practice. Canvas can also come in different textures, depending on how it’s woven. The finer it’s woven together, the smoother the texture. If you prefer smooth, detailed strokes, you’ll want a very finely woven canvas. If you want bold, textured strokes, you may prefer a rough texture.Another thing to consider is cost. There are two types of canvas: linen and cotton. Linen is the top of the line, and is expensive. Cotton, while lower in quality, is affordable and more than suitable for long lasting paintings.Each canvas can come primed or unprimed. For oils, you’ll always want to either find a pre-primed canvas, or prime your own with gesso. Acrylics can be painted onto an unprimed canvas, but the colors will be duller, than on a canvas that is primed with gesso. Gesso makes sure that the paint will adhere properly to thecanvas.You’ll want a good surface that can handle whatever medium you throw at it. Try a few different types of canvases, or papers, and see which one suits your painting style the best! Article by McCaela GatesMade especially for MyArtscape
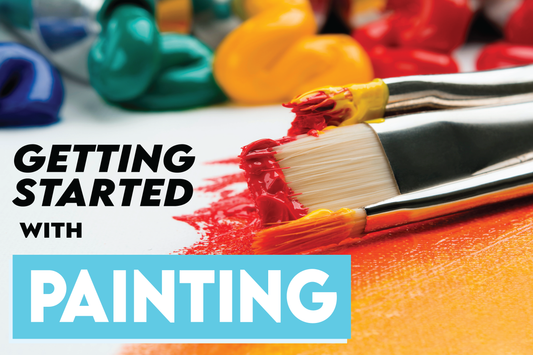
Getting Started with Painting
So you want to get into painting, but you’re not sure where to even begin. Well, look no further. We're going to go over things you’ll need to get started into painting.
SIMPLE STEPS TO BECOMING AN AWESOME PAINTER – PART 2
Part 2: Selecting the Right Brush Head
In the previous article we covered hair type and which types are best suited to each painting medium. We learned that the finest, most expensive brushes are Kolinsky brushes. While you could use these for heavy duty tasks, such as the under-painting on an oil-painting, the brush would not last very long. Not to mention that it is very difficult to maneuver thick oil paint using such a soft brush.
For this task, it would be much better to use a cheaper hog bristle brush. By the same token, if you try to paint watercolor using the same hog bristle brush, you probably won’t have much success.
As artists we need to learn to match a paint brush to task. Part 1 discussed selecting the best hair – this article is going to focus on how to pick the best head type to achieve the painting effect you are looking for.
Flat
Flat Paint Brushes
Flat brushes are probably the most common type of paint brush. Generally speaking, the length of the hairs will be twice as long as they are wide.
They are great for blocking in areas and laying down lots of color. They are usually used for acrylics and oils.
Bright
Bright Paint Brushes
Bright brushes are a special kind of flat brush where the width of the brush is approximately equal to the length of the bristles. The bristles tend to curl inwards at the tip.
This gives better control compared to using a normal flat. They are used for covering large area as well as for blending. They are usually used for oil and acrylic painting.
Wash
Wash Brushes
Wash brushes can have variable shape but the length of the bristles is very short in relation to the width of the brush.
Wash brushes are useful for broad strokes and laying in lots of color. Generally they are used in watercolor painting.
Angle
Angle Paint Brushes
As the name implies, the hair filaments are cut at an angle.
This is a versatile brush is useful for precision painting, lines, curves and floating – a technique commonly used with acrylics.
During this process different colors of paint are loaded onto the brush to create a gradation of color.
Filbert
Filbert Paint Brushes
Filberts are awesome for oilsand acrylics. Depending on the way you hold the brush, you can turn them into a round or a flat – this makes them a great multi-functional brush.
The rounded top makes them very well suited to blending, but they can also be used to block in large areas as well as for detailed work during portrait painting.
Round
Round Paint Brushes
Rounds are predominantly used for watercolor painting, because the fine point allows for precise work while the body of the brush can still hold plenty of water.
That means that you can paint precisely while still being able to cover large areas.
Rigger / Script liner
Rigger Paint Brushes
These brushes are usually narrow and have very long hairs, which allows them to hold a lot of paint.
They are used to paint fine lines with a constant width, which makes them perfect for lettering, animal whiskers, tree branches and signing your name.
Generally, they are very useful for watercolor painting.
Fan
Fan Paint Brushes
The fan brush has a bristles spread in an arc by the ferrule.
Commonly this is used forblending, feathering andshading.
They are quite useful for painting detailed objects like trees, branches, grasses or animal hair.
Feathering Shader / Comb
Feathering shaders and comb brushes (sometimes called rakes) aretexturizing brushes which end with natural fingers.
Paint is loaded onto the body of the brush, which is slowly released by the fingers. They are great for cross hatching, water, fur, hair, grasses, wood graining, feathers etc.
What types of brushes do I use?
While I do use all the shapes, the most common ones I use are Flats, Rounds and Filberts. If I had to pick one type for each media, I would pick Rounds for watercolors, Flats for acrylics and Filberts for oils.
You should try to experiment with different brush types and you may just be surprised with the results. Don’t limit your creativity!
Finding the perfect brush can be quite an effort, but is definitely worth the time and expense. Finding a brush that is right for you is a very rewarding experience and enhances the enjoyment you will get from your painting.
Fortunately the MyArtscape brush set covers almost all of these brush types and is constantly under development. I can confidently say that this is one of the most comprehensive synthetic brush sets out there.
Part 1 – Selecting Hair Type
Stay tuned for further tips to become a better painter.
Happy Painting :-)
SIMPLE STEPS TO BECOMING AN AWESOME PAINTER - PART 1
Part 1: Selecting Hair Type
The sheer array of paint brushes available can seem quite overwhelming for the beginner or even the experienced artist. This article will help you pick which type of brush to use for each medium as well as choose which head shape is most suitable for you. Part 1 will cover the hair type and Part 2 will cover the shape styles.
Hair, you say?
Art paint brushes are usually either made from animal hair or synthetic hair. Most brushes are made from animal hair and the quality of the brush will depend on the grade of hair being used. Typically, the quality of an art paint brush is related to its spring (ability to bounce back into shape), feel and the evenness of the brush stroke.
Animal hair has some unique characteristics which make it a good choice for art paint brushes. Each hair has small micro-scales on the hair filament. These scales coupled with varying hair filament diameter, enable animal hair to efficiently store paint and deliver it more consistently over longer brush strokes. However, synthetic hair technology is fast catching up to animal hair fiber and offers a good alternative to expensive animal hairs.
Using the correct brush with the right medium
Kolinsky (Weasel)
Kolinsky paint brushes
Kolinsky hair is obtained from the tail-hair of a weasel (Mustela sibirica) and is used to make the finest quality art brushes. They are much sought after for their longevity, its ability to hold a fine point and excellent snap. Since the hair is now fairly rare, they command a premium price.
Given their great water holding capacity, they make ideal watercolor brushes, although they can be used for fine detailing with oils. Usually these are sold as short handle brushes, since they are predominantly used for watercolor painting, which is generally painted flat. A long handle can get in the way and be a hazard to your eyes!
Note than there is currently an import ban on Kolinsky hair into the US because of a recent inclusion on the CITES list. While it is not illegal to import to the US, there is now much more stringent documentation required.
Sable (Mink)
Sable paint brushes
Sable hair is from the mink(Martes zibellina), a special kind of marten that inhabits forest environments. A pure sable hair brush makes a fine brush. They will hold a full body paint, maintain a fine tip, have good snap and will be much cheaper than pure Kolinsky hair.
Sable brushes are usually used for watercolors, but they can also be used for fine finishing with oils (especially the courser grades).
Confusingly some manufacturers label brushes as “Kolinsky-sable” or “Kolinsky red sable”. This is not strictly speaking correct, as a Kolinsky and a sable are two different animals, although blends of the two hairs are possible.
The situation is further complicated by the term, ‘red sable’. Some manufacturers use this to denote sable blended with an inferior quality animal hair, while others use it as a term for pure sable hair. Either way, look for a pure sable or pure red sable brush for the highest quality paint brush.
Again these are generally sold in short handle form, although long handle variations are available if you look around.
Hog (Pig)
Hog paint brushes
Commonly called bristle brushes, the hair in these paint brushes comes from pigs. The hair is stiff and holds little moisture, making them a poor choice for watercolor or gouache. They have great strength and resilience, making them excellent for oils and acrylics.
Be quite careful of cheap bristle brushes – they are weak and splay very easily, shed hair quite badly and leave stroke marks on your canvas. The best bristle brushes use Chungking bristle sourced from hogs raised in the Chungking region of Central China.
Chungking or Chonqing bristle has the longest flags. Flags are like split ends on the end of bristles. They are extremely important to the quality of the bristle. In theory, longer flags allow the brush to hold more paint and apply it more evenly.
Generally speaking, bristle brushes are used to shove thicker oils and acrylics around the canvas. Since much of the painting is done in a standing position, these are traditionally sold as long-handle brushes.
Synthetic
Synthetic paint brushes
The quality of synthetic hair in art paint brushes has improved greatly in the last two decades or so. There are synthetics which can mimic sable hair, mongoose hair and a variety of other high quality animal hairs. They can now rival the performance of expensive animal hairs for a fraction of the price.
Synthetics are extremely versatile and can be cheaper than high quality animal hair. Soft synthetics can have an excellent point and can carry water well, making them a good choice for watercolor and gouache. Stiffer brushes can work very well with acrylics and oils. They can also be blended with hairs like sable, to make cheaper, but high quality, brushes.
Since they are so versatile, you will be able to pick long or short handle varieties depending on which medium you want to work in.
What types of hair do I use?
Well this depends somewhat on the medium I am painting in. When I paint in watercolors I rely on synthetics to cover large areas and usually more expensive sable or Kolinsky brushes to work on more detailed areas.
I also use sable or Kolinsky to work on the fine detailing when I am oil painting, although the bulk of the oil painting I tend to do in hog or synthetic brushes. Since I tend to use oils quite thinly, synthetic brushes work great for me, but you might want to test that out for your own style.
When I paint in acrylics, I would say 90% of time I am using synthetics. They are cheap, don’t shed and don’t leave trailing brush strokes like some bristle brushes. To block in large areas of color, I might use bristle brushes and for the fine details areas I sometimes rely on my fine-tipped sable brushes.
Part 2
In Part 2 I will go over which brush heads to use to achieve different results. Make sure you catch that article!
Happy Painting :-)